Window Insulation

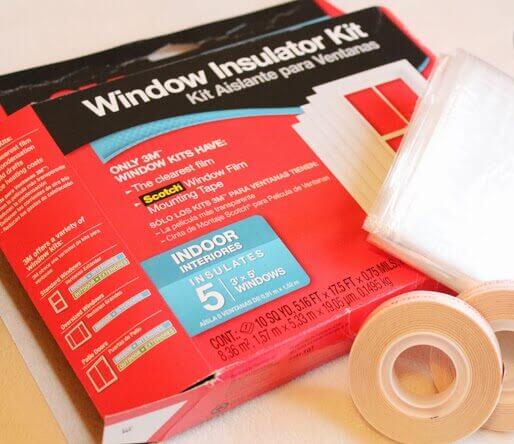
Window insulator kits are an affordable and effective way to improve your home’s energy efficiency by reducing drafts and preventing heat loss. Here’s a professional step-by-step guide to install a window insulator kit:
Materials You’ll Need:
- Window Insulator Kit (available at Home Depot)
- Measuring tape
- Scissors
- Hairdryer (or heat gun)
- Rubbing alcohol (or glass cleaner)
- Soft cloth
Step-by-Step Installation:
- Measure Your Window:
- Use a measuring tape to get the dimensions of your window frame. This will ensure that you cut the plastic sheet provided in the kit to the correct size.
- Clean the Window Frame:
- Thoroughly clean the window frame and glass using rubbing alcohol or glass cleaner to ensure the tape adheres properly. Let it dry completely before proceeding.
- Cut the Plastic Film:
- Unfold the plastic film from the insulator kit and cut it slightly larger than the dimensions of your window, leaving some extra for adjustments.
- Apply the Double-Sided Tape:
- Attach the provided double-sided tape around the edge of your window frame. Press it firmly to ensure a good seal.
- Carefully peel off the backing from the tape, exposing the adhesive.
- Attach the Plastic Film:
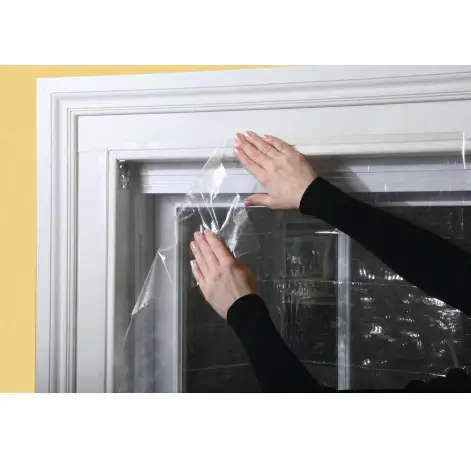
- Starting from the top, gently attach the plastic film to the tape, making sure it is smooth and taut. Press the film against the tape to ensure a tight seal. Work your way down the sides and bottom, pulling the film slightly to avoid wrinkles.
- Seal and Shrink the Film:
- Once the plastic is securely attached, use a hairdryer or heat gun to shrink the film. Start from the top and move in a circular motion, holding the dryer a few inches away from the film. As it heats up, the film will tighten and become nearly invisible.
- Trim Excess Film:
- Use scissors or a utility knife to carefully trim any excess plastic around the edges for a neat finish.
Where to Buy:
You can find window insulator kits at Home Depot. One popular option is the Frost King Window Insulator Kit, which is available online or at most Home Depot locations.
Shop Frost King Window Insulator Kit at Home Depot
This simple process can significantly improve your home’s comfort and energy efficiency during colder months.

Troubleshoot Common Issues
Even with careful installation, you may encounter some issues with your window insulator kit. Here are some common problems and how to address them:
A. Deal with stubborn wrinkles
Stubborn wrinkles can detract from the appearance and effectiveness of your window insulation. To address this:
- Reheat the wrinkled areas with a hairdryer, moving slowly and evenly.
- Gently stretch the film while heating to encourage smoothing.
- If wrinkles persist, consider reapplying that section of film.
B. Fix tears in the film
Small tears can compromise the insulation’s effectiveness. Here’s how to fix them:
- Clean the area around the tear with rubbing alcohol.
- Apply a small piece of clear tape over the tear, extending slightly beyond the damaged area.
- Use a hairdryer to reshrink the repaired section, ensuring a smooth finish.
C. Address gaps or loose edges
Gaps or loose edges can allow drafts to enter. To resolve this issue:
- Clean the problem area thoroughly.
- Apply additional double-sided tape to secure loose edges.
- If necessary, trim excess film and reapply it to the problematic section.
| Issue | Solution | Prevention |
|---|---|---|
| Wrinkles | Reheat and stretch | Apply film evenly, avoid overstretching |
| Tears | Patch with clear tape | Handle film carefully during installation |
| Gaps/Loose Edges | Reapply tape and film | Ensure thorough cleaning before installation |
By addressing these common issues promptly, you can maintain the effectiveness of your window insulation throughout the season. Next, we’ll discuss how to properly maintain your newly installed window insulation to ensure long-lasting performance.
Maintain Your Window Insulation
Now that you’ve successfully installed your window insulator kit, it’s important to maintain it properly to ensure its effectiveness throughout the year. Let’s explore some key aspects of maintaining your window insulation.
Seasonal Considerations
Different seasons bring unique challenges for your window insulation:
- Spring/Summer: Check for any damage from UV exposure or heat
- Fall: Inspect for gaps or loosening due to temperature fluctuations
- Winter: Monitor for condensation or frost buildup
| Season | Main Concern | Action |
|---|---|---|
| Spring/Summer | UV damage | Inspect and replace if brittle |
| Fall | Gaps | Re-seal edges if necessary |
| Winter | Condensation | Improve ventilation if needed |
When to Replace the Insulator Kit
While window insulator kits are durable, they don’t last forever. Consider replacement when:
- The film becomes cloudy or yellowed
- You notice tears or holes in the film
- The adhesive strip no longer sticks properly
- After 2-3 heating seasons (typical lifespan)
Regular Cleaning Tips
Proper cleaning extends the life of your window insulation:
- Use a soft, damp cloth to gently wipe the film
- Avoid harsh chemicals or abrasive materials
- Clean dust and debris from the window sill regularly
- Check and clean the edges where the film meets the tape
By following these maintenance guidelines, you can ensure your window insulator kit remains effective, helping you save energy and maintain comfort in your home throughout the year. Regular inspections and proper care will maximize the lifespan of your insulation, providing long-term benefits for your home’s energy efficiency. Keep your home warm and energy-efficient with expert help from our team. Whether it’s window insulation or a full home upgrade, we’re here to provide top-quality service. Call us today at 908-206-4240 to get started on your next project!


